This article is specifically designed for those who are just starting with our video intercom and the Slinex Smart Call mobile app and want to smoothly complete the entire process – from app installation to the first device connection.
We've included screenshots from the official video guide to visually illustrate each step.
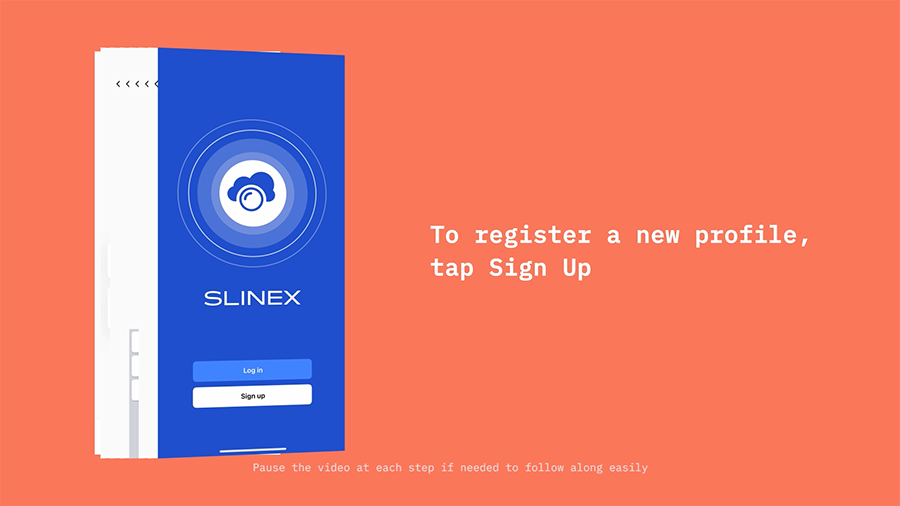
Step 1. Install the App and Register
Open the app and tap the "Sign up" button on the start screen.
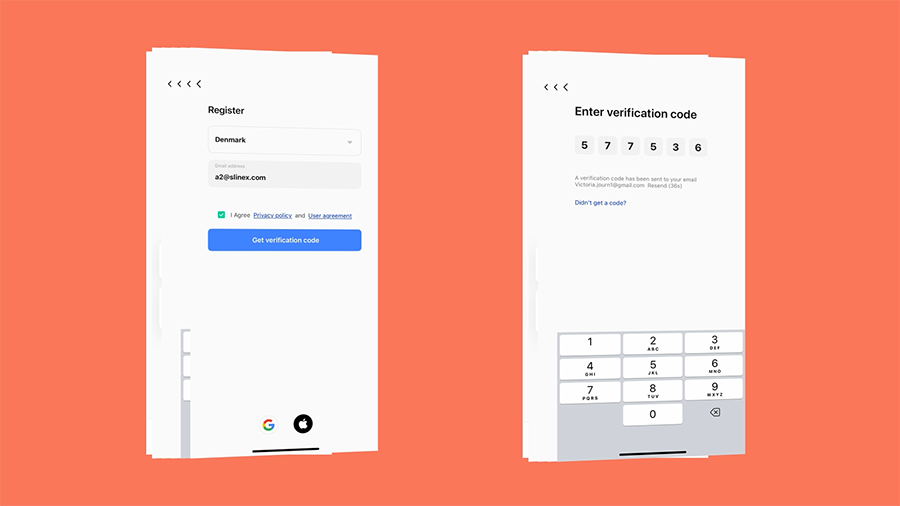
You can register using your Google or Apple account. Select your preferred option and follow the on-screen instructions.
If neither option suits you, enter your email, check the consent box for Terms and Privacy Policy, and tap "GET CODE". A six-digit code will be sent to your email – enter this code in the "Verification code" field.
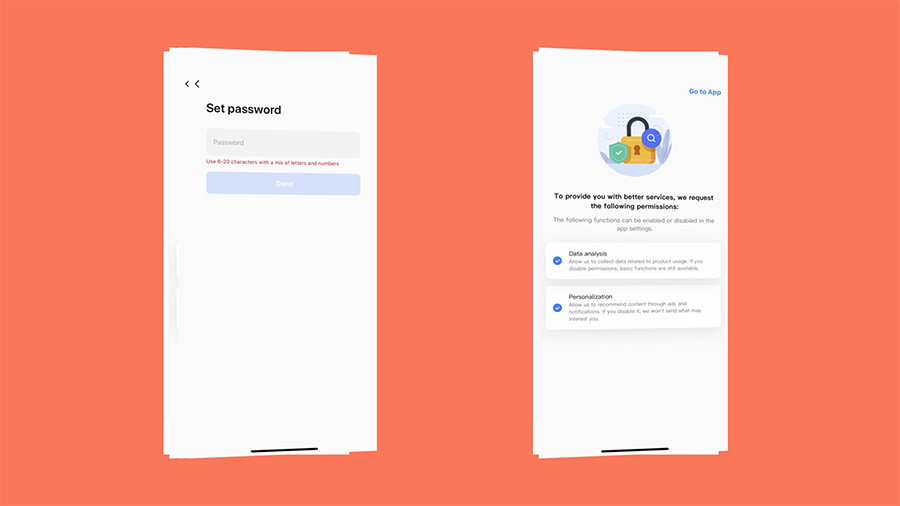
Create a password – it must be unique and contain at least 8 characters.
Allow the app access to notifications, camera, and phone storage (these permissions are needed for calls and saving snapshots).
At this point, the registration is complete. However, the device setup is not yet finished.
Step 2. Switch the Video Intercom to Access Point Mode (AP Mode)
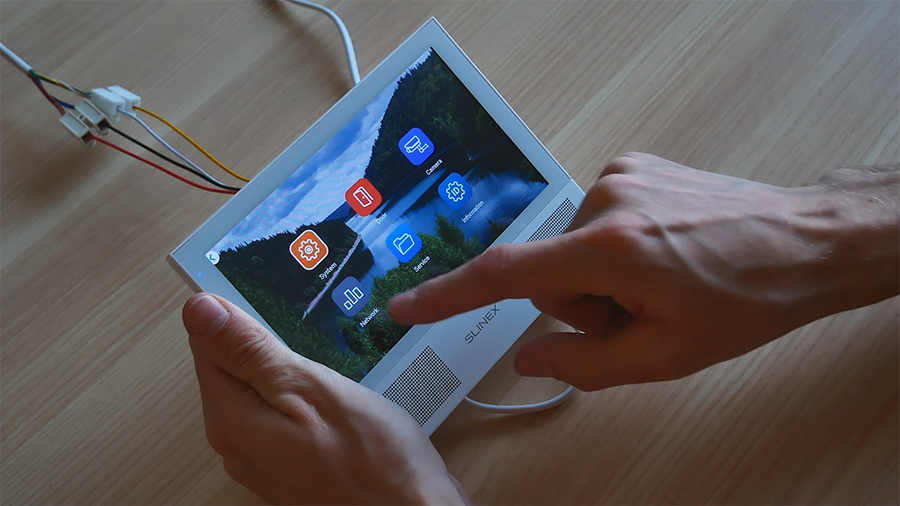
On the intercom panel, go to Settings → Network.
Activate the AP Mode option and wait for the device to reboot.

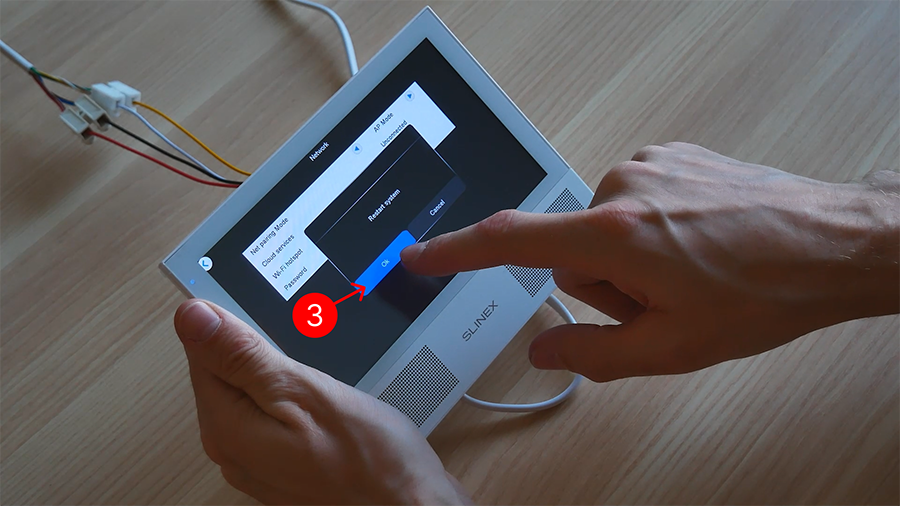
After the intercom reboots, go again to Settings → Network. Ensure the network name and password are displayed.
What is AP Mode?
Access Point Mode is a mode where a device (like a router or video intercom) functions as an access point for other devices. In this mode, the device creates its own wireless network that other devices such as smartphones, tablets, or computers can connect to. Simply put, your intercom will distribute Wi-Fi similarly to a regular router. You can connect to this network from your phone or computer to configure the intercom or view the camera feed—even without an internet connection at home.
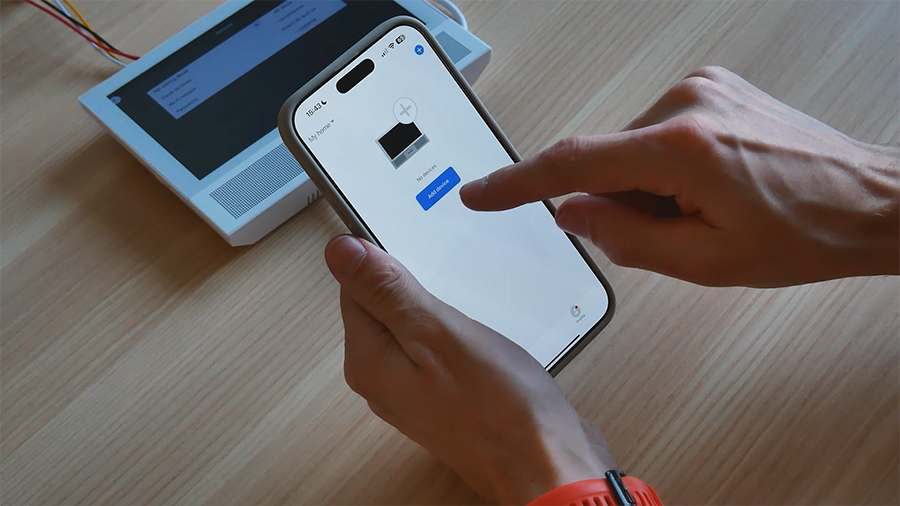
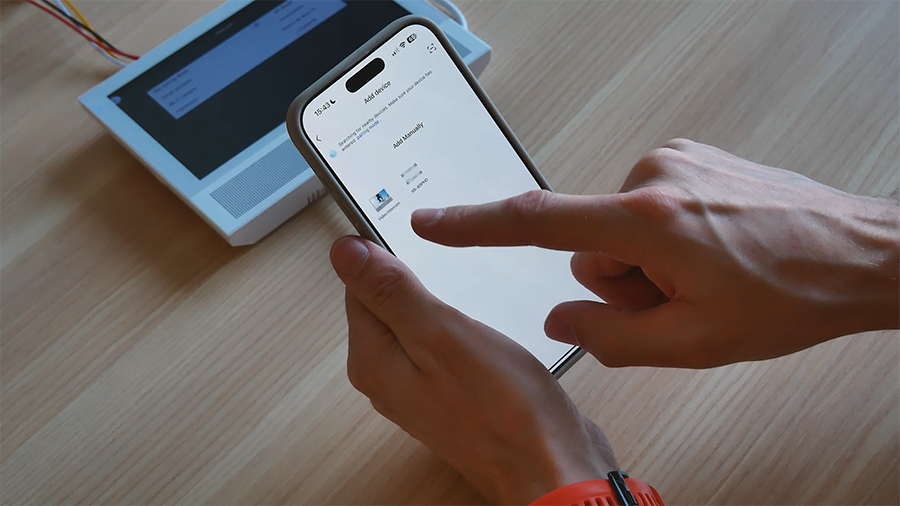
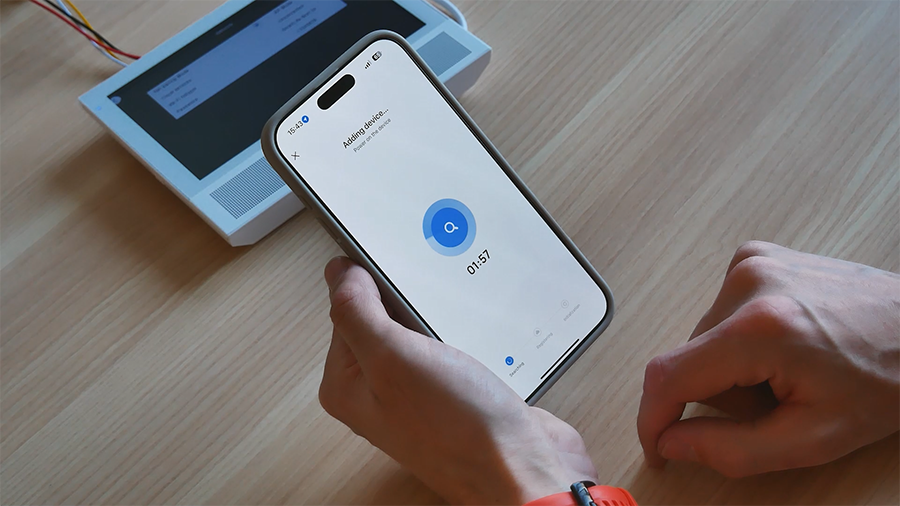
Step 3. Add the Device to the App
In the app, tap "Add device" and select your video intercom.
Select Wi-Fi Mode and tap "Next." If you've already activated AP Mode on your intercom, feel free to tap "Next." If not, return to Step 2 and follow the instructions. Then tap "Next."
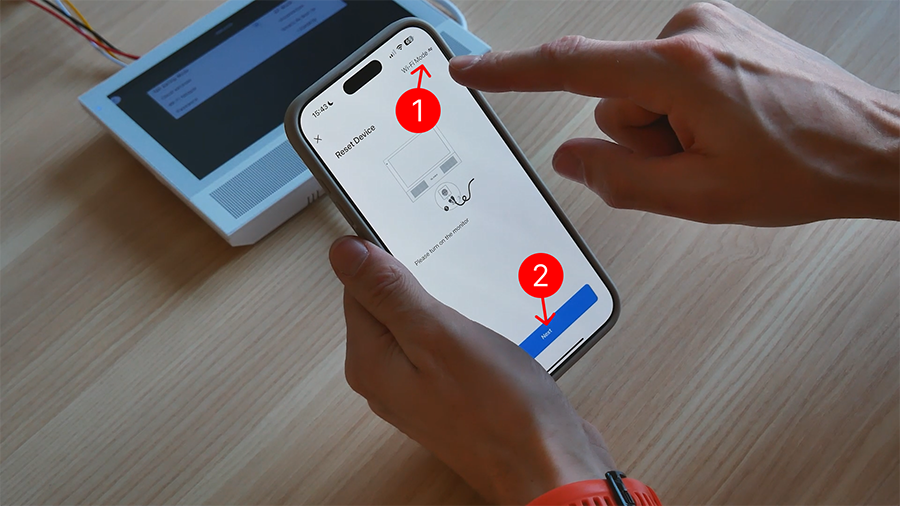
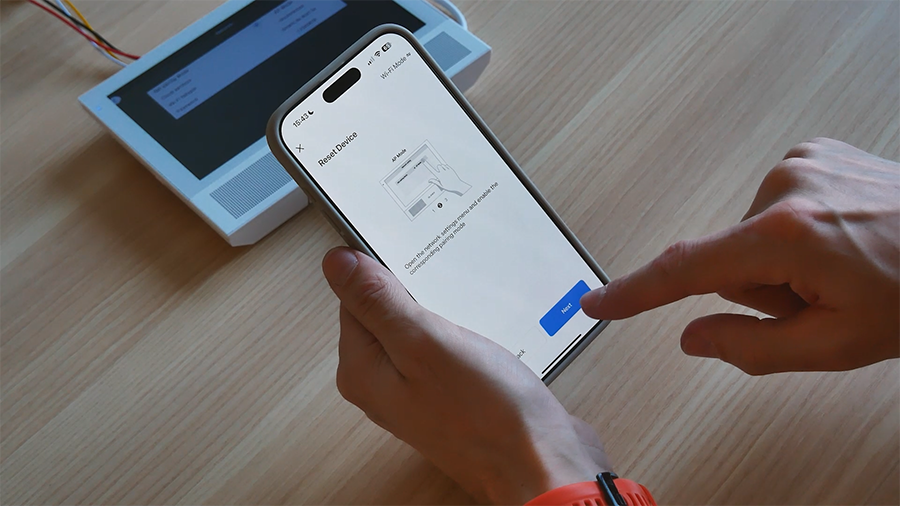
Ensure the device has switched to AP Mode.
Next step – select AP Mode in the app (e.g., "Blink Quickly") to confirm the device is ready for connection.
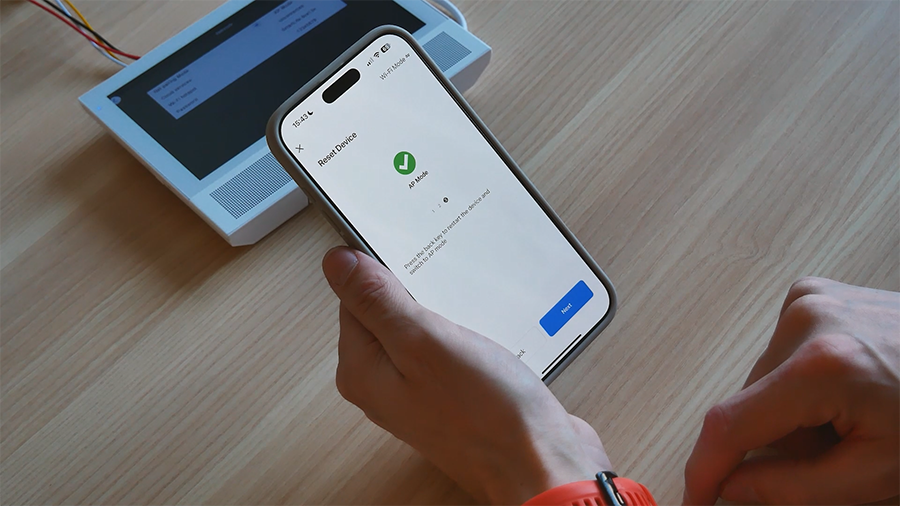
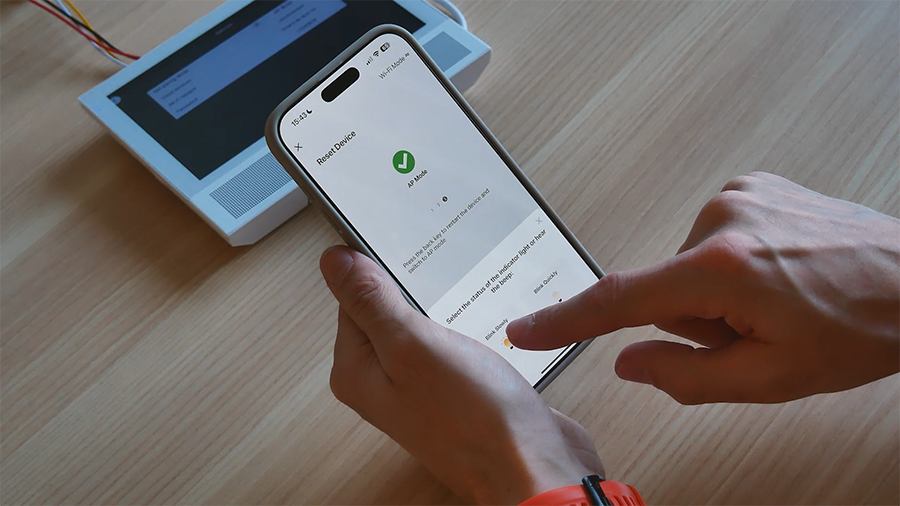
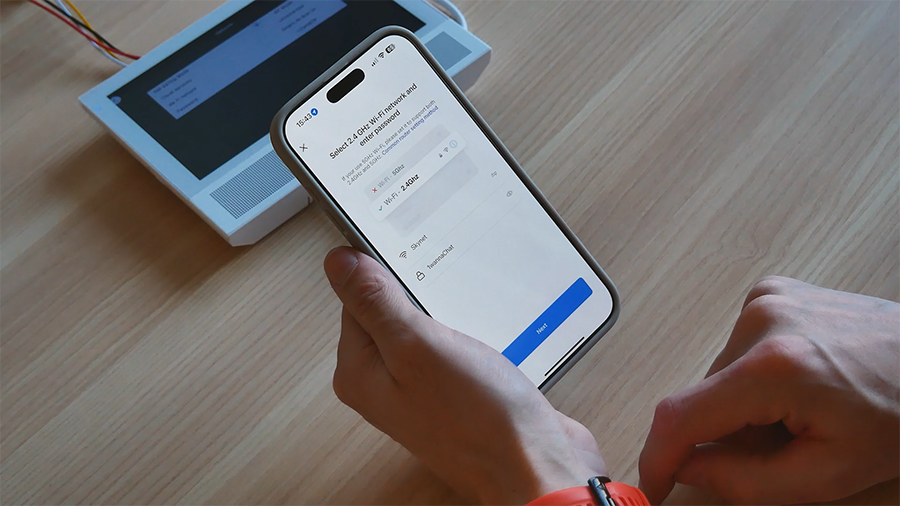
Your home network (Wi-Fi) name and password will be filled automatically. If not, enter them manually.
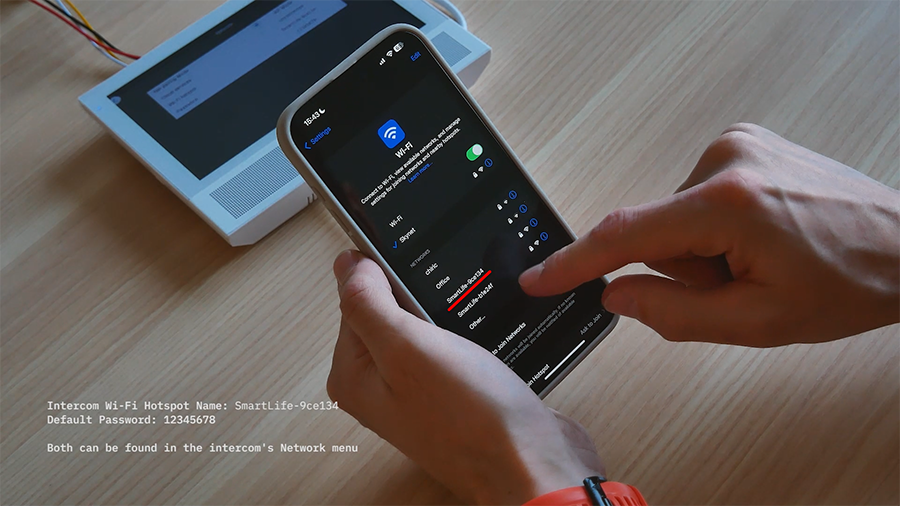
Step 4. Connect to the Intercom’s Access Point
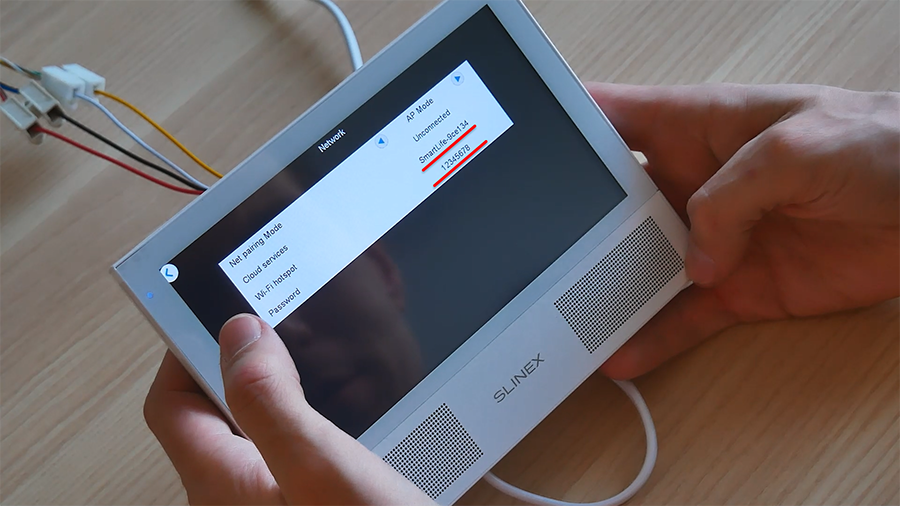
Open Wi-Fi settings on your smartphone. Find and select the network matching the information shown on the intercom's Network menu.
Enter the default password shown in the Network menu of intercom.
Example from Network menu:
+ Access point name: SmartLife-9ce134
+ Default password: 12345678
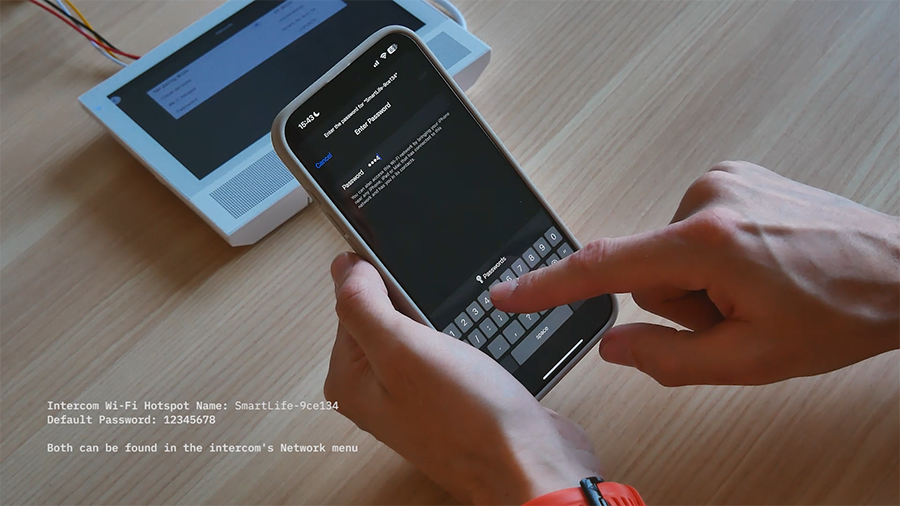
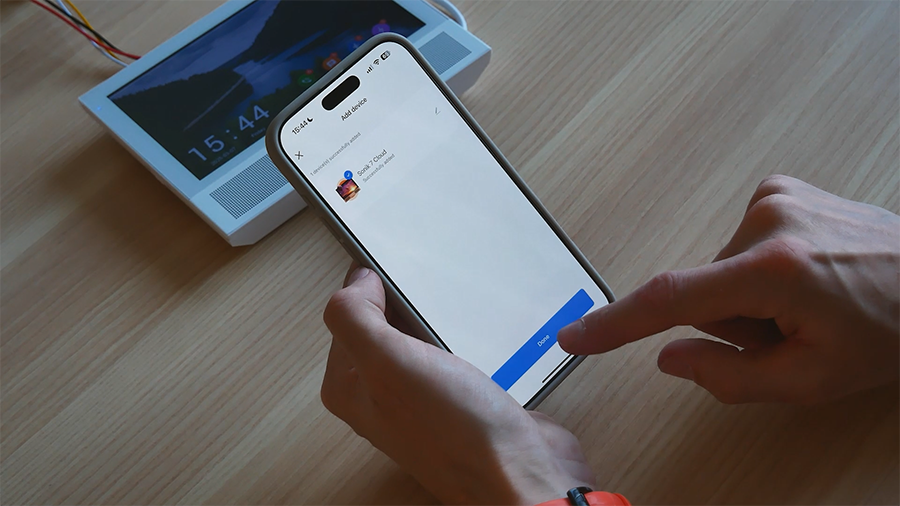
Once your smartphone connects, return to the app – the synchronization will start automatically.
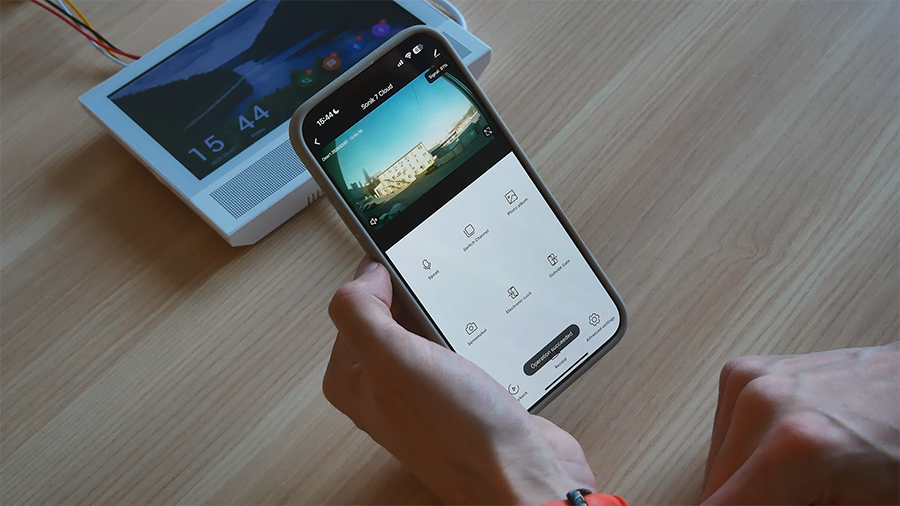
Step 5. Finalize the Setup
After a few seconds, you'll see the message "Operation succeeded." Now your intercom is ready: you’ll receive calls, remotely open the door, and view the event history.
Useful Tips
If your Wi-Fi password changes, the device won't reconnect automatically. You’ll need to reset it to factory settings and set it up again. If the signal is weak, move your router closer to the door or use a repeater.
Where to Find More Information?
This article describes the features available in the Slinex Smart Call app and how to configure them.
Having trouble? Contact support via the app’s chat. Our specialists will be happy to assist you.
Now you know how to quickly register and connect your Slinex Smart Call. Enjoy the convenience and security of your new video intercom!